

Build an app in the UI
Create, configure, and deploy a Keboola app from the interface.
Build an app directly in the Keboola interface when you want to set it up yourself without coding from scratch.
Before you start
Section titled “Before you start”- A Keboola project with the data you want to use.
Create the app
Section titled “Create the app”Manual creation lives on the Create App screen, under or create manually — pick a stack and Keboola sets the app up for you to configure.
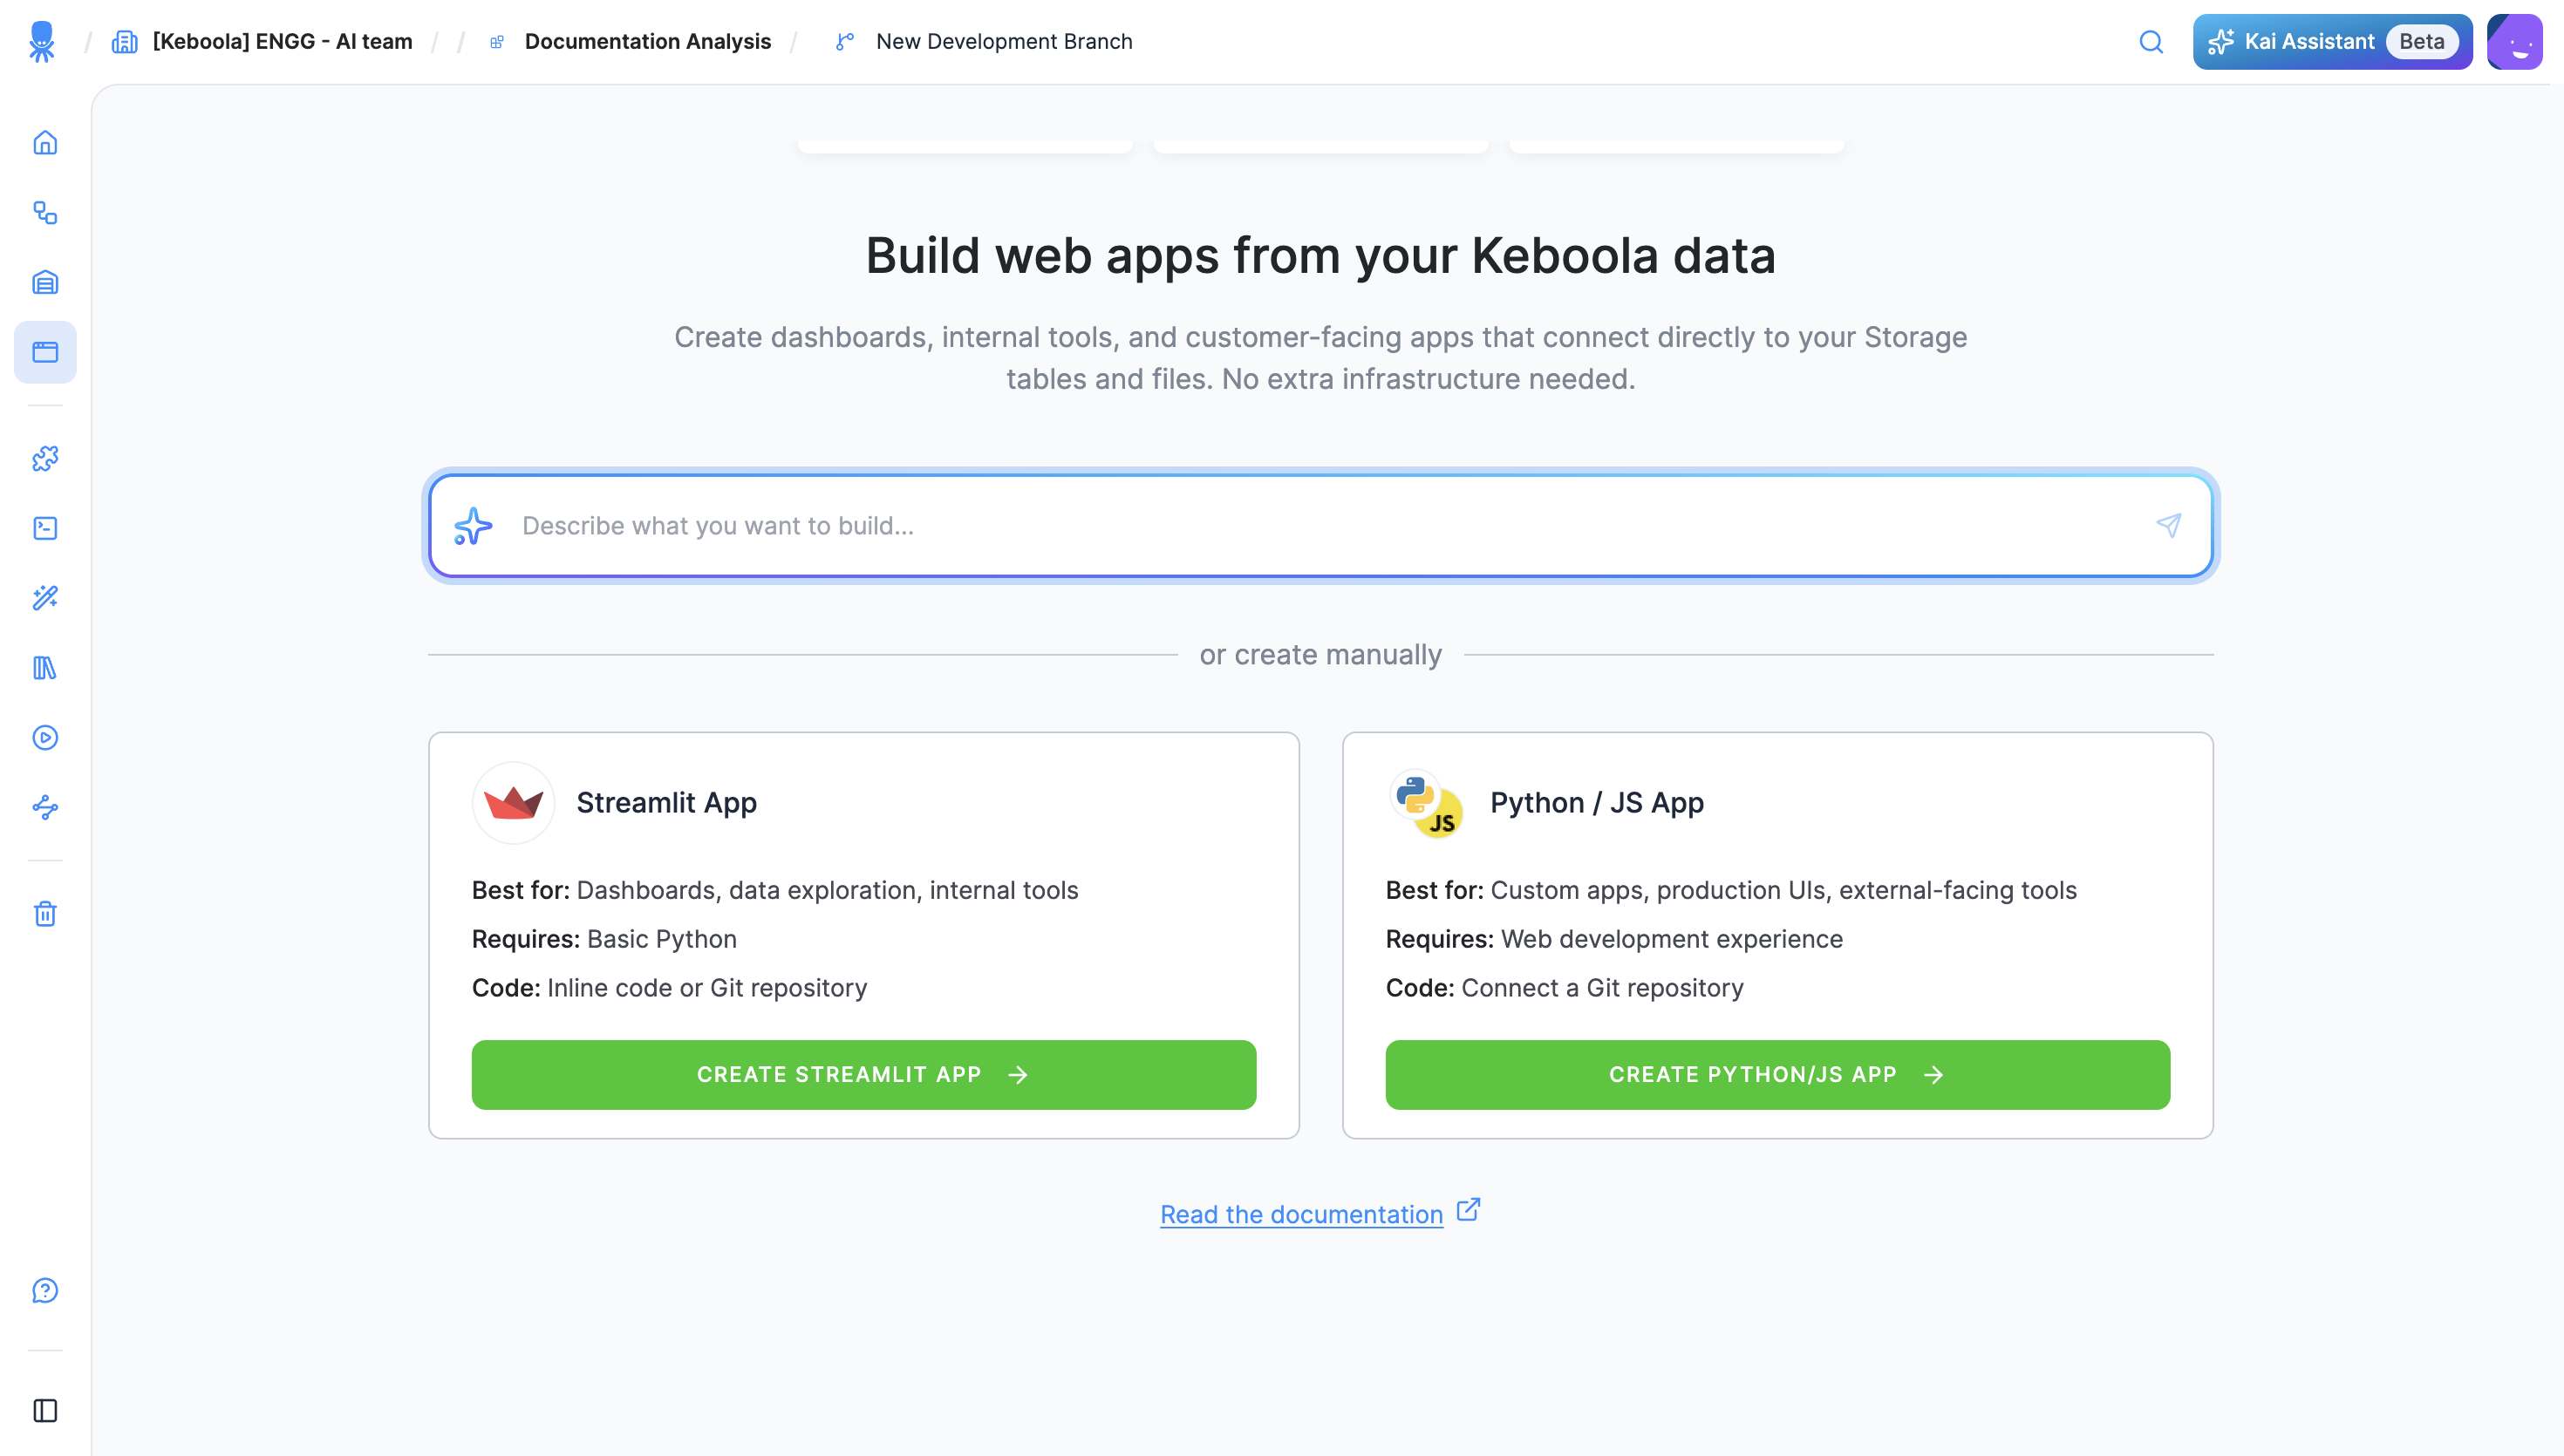
- In your Keboola project, open Apps and click + Create App.
- Under or create manually, choose a stack — Streamlit (dashboards, data exploration, internal tools; basic Python) or Python / JS (custom apps, production UIs; connect a Git repository).
- Name the app and click Create App. It opens on its own configuration page, marked Not Deployed.
- Set the Code Source — paste inline Code or connect a Git Repository — and pick the Authentication method.
- Configure the rest of the app’s settings — backend size, auto-sleep, and more; see Reference for the full list.
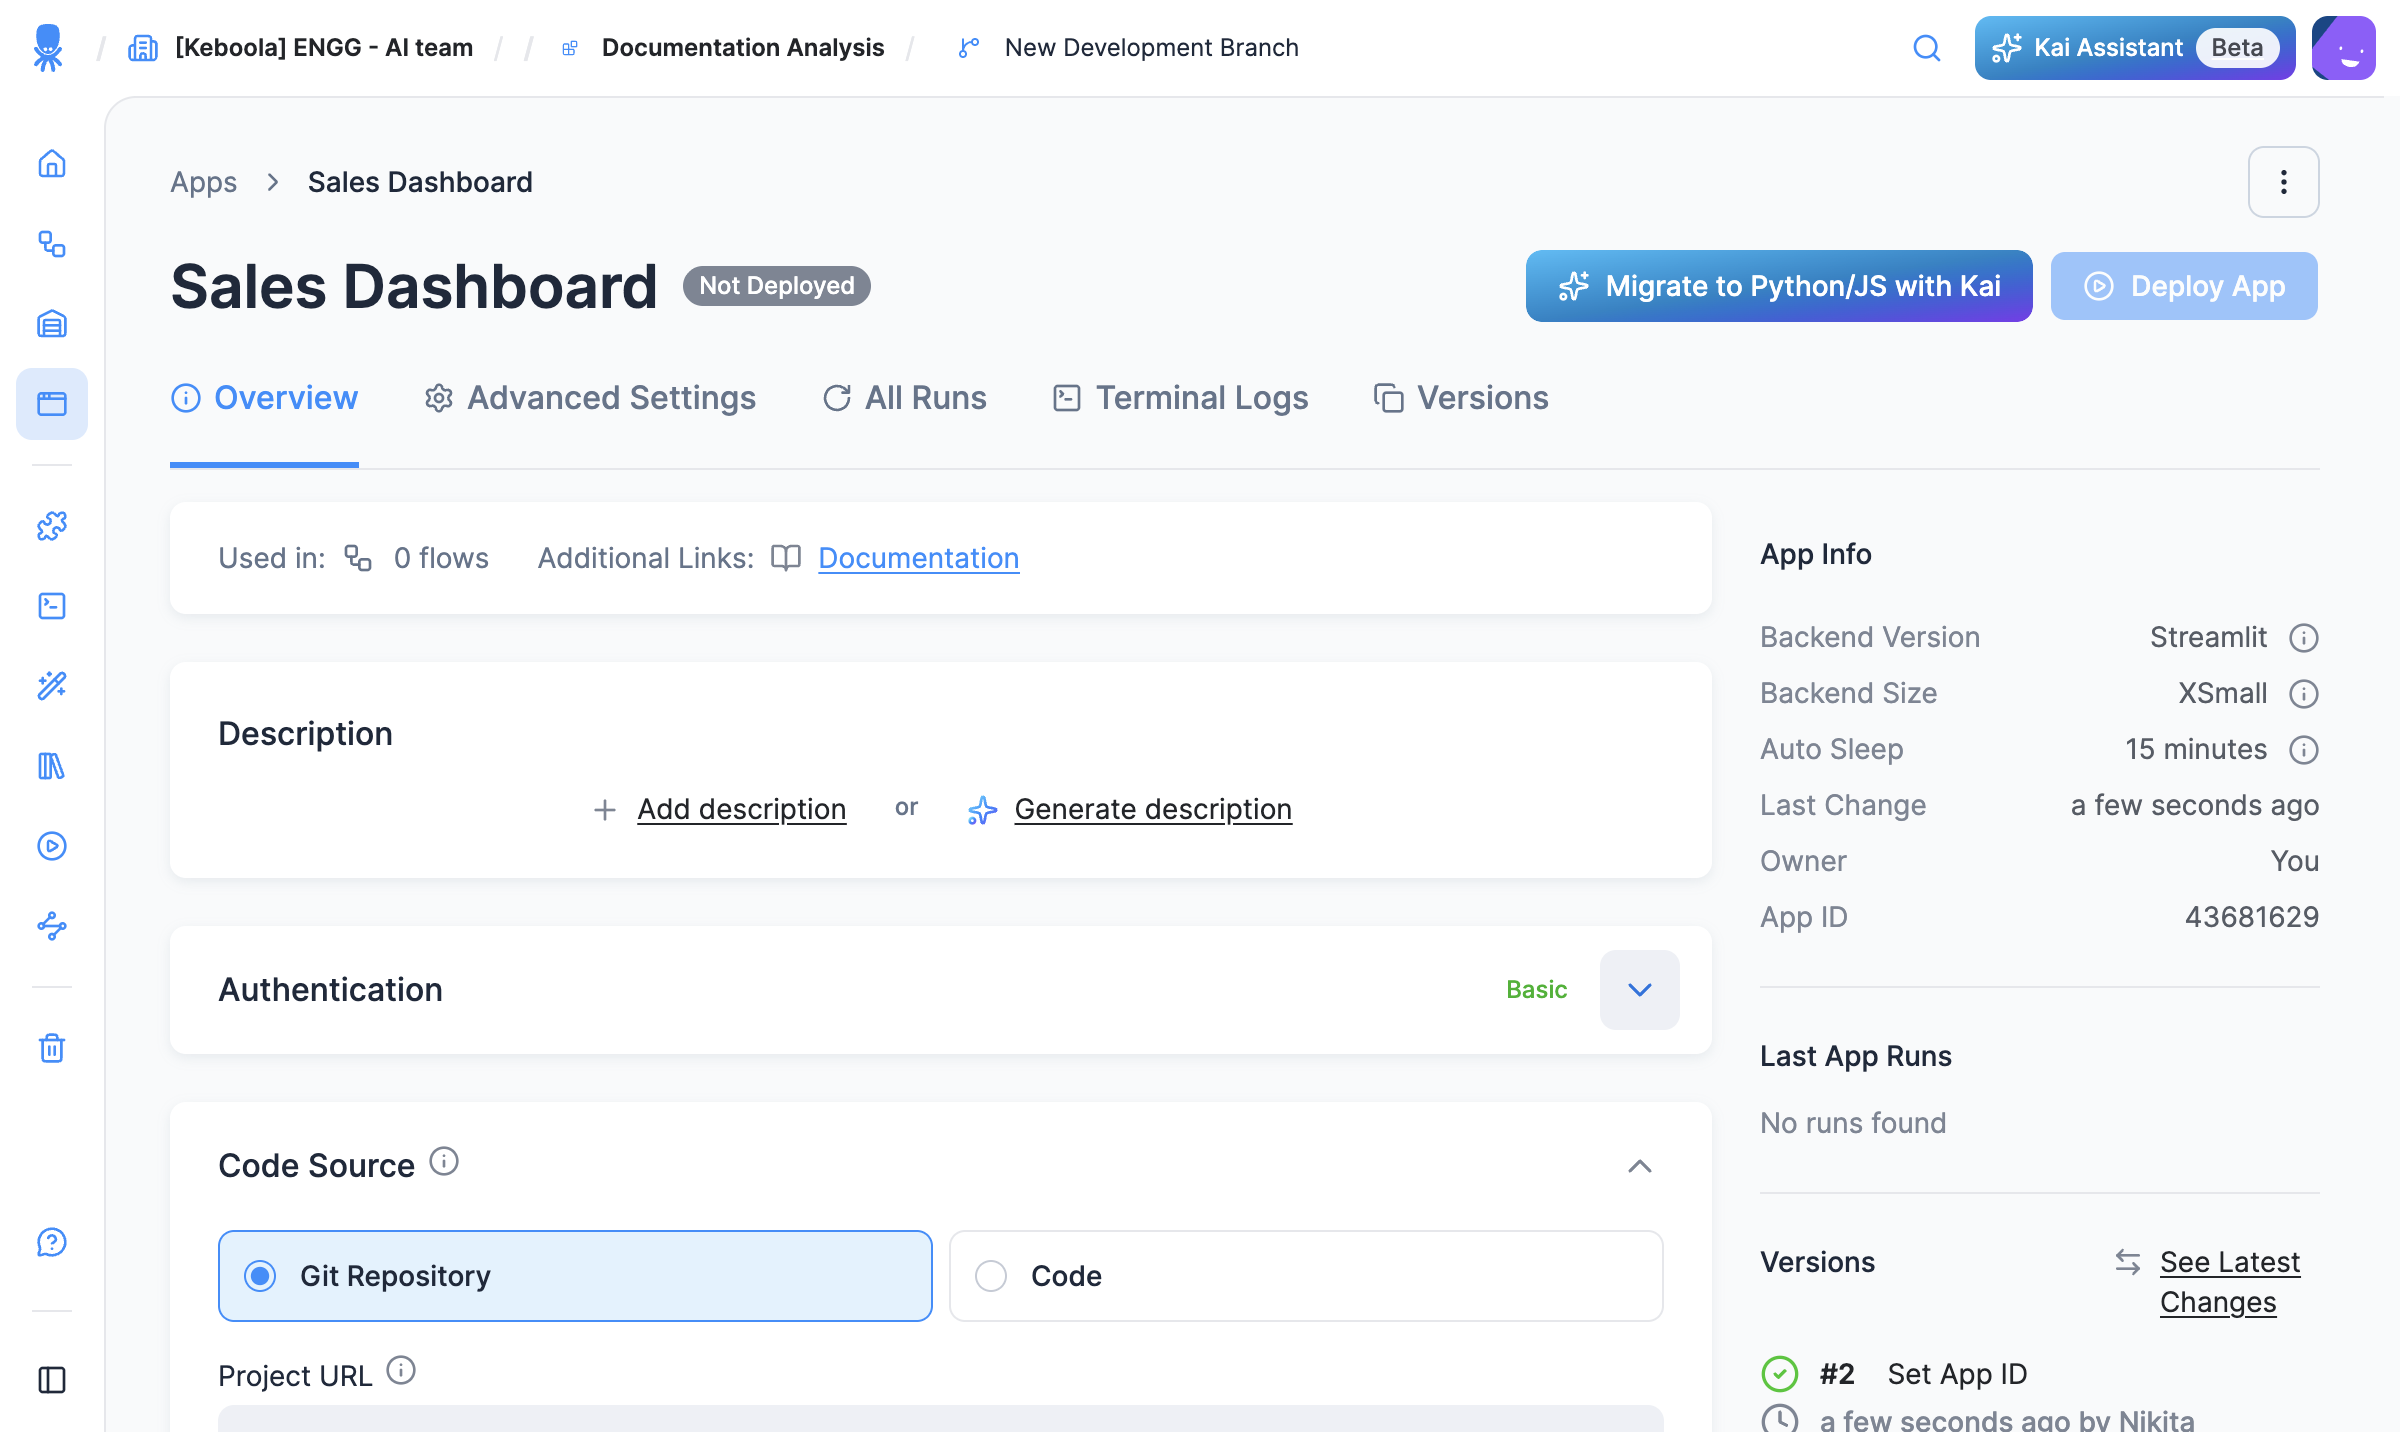
- Click Deploy App. A short wizard asks for the backend size and an inactivity timeout, then deploys the app. (The same wizard runs on Redeploy.)
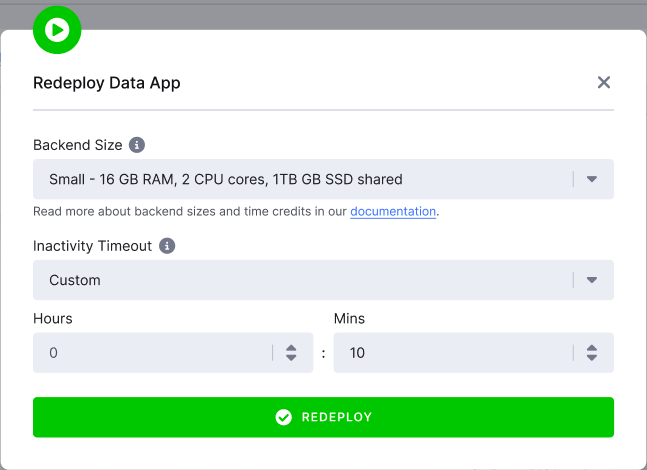
- When the status turns Active, click Open App to open it at its public URL. Use Redeploy to apply any later config change; see App actions.
Configure access and settings
Section titled “Configure access and settings”Each app has its own settings, including authentication, URL, and versioning. See:
- Authentication — who can open the app.
- Reference — all per-app settings.
Next steps
Section titled “Next steps”- Publish and share
- Want Kai to set this up for you instead? See Build with Kai.